
Table Saw Push Stick Templates: A Comprehensive Guide
Numerous downloadable table saw push stick template PDFs are available online, offering various designs for DIY construction and enhanced workshop safety.
What is a Table Saw Push Stick?
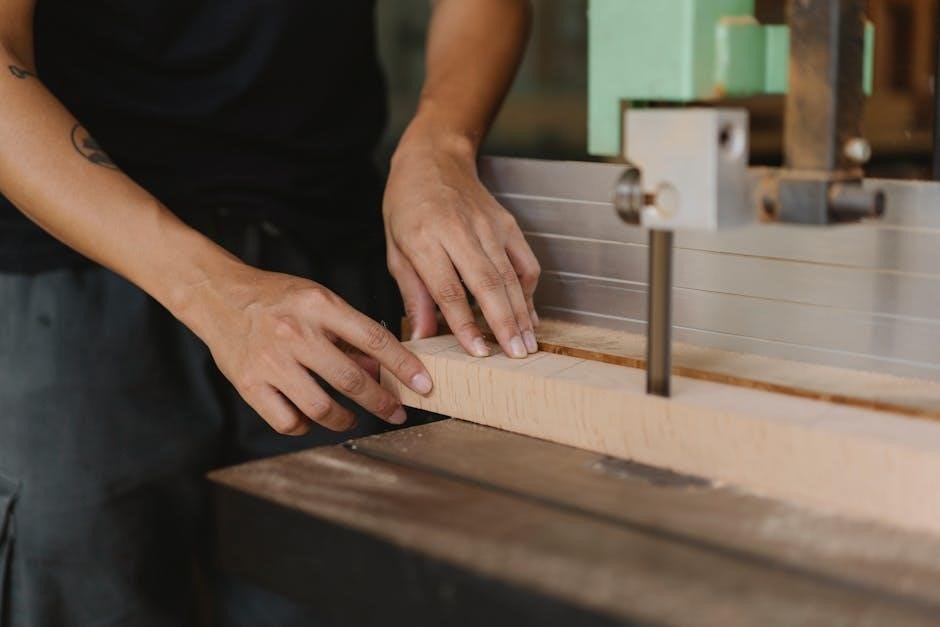
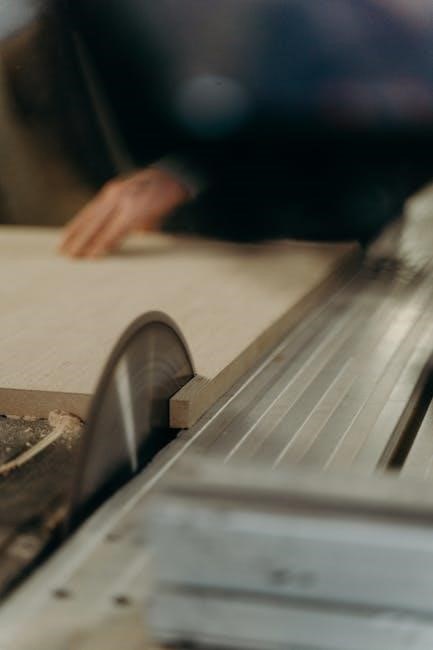
A table saw push stick is a crucial safety tool designed to keep your hands and fingers safely away from the spinning blade during operation. It’s a handheld device used to control the movement of the workpiece, particularly during rip cuts, ensuring a safe distance between you and the cutting zone.
Essentially, it extends your reach, allowing you to maneuver wood through the blade without directly placing your hands in harm’s way. While designs vary, the core function remains consistent: to provide a barrier and maintain control. Many users even create their own using a table saw push stick template PDF for customized fit and comfort, prioritizing quick access to a safe tool when needed.
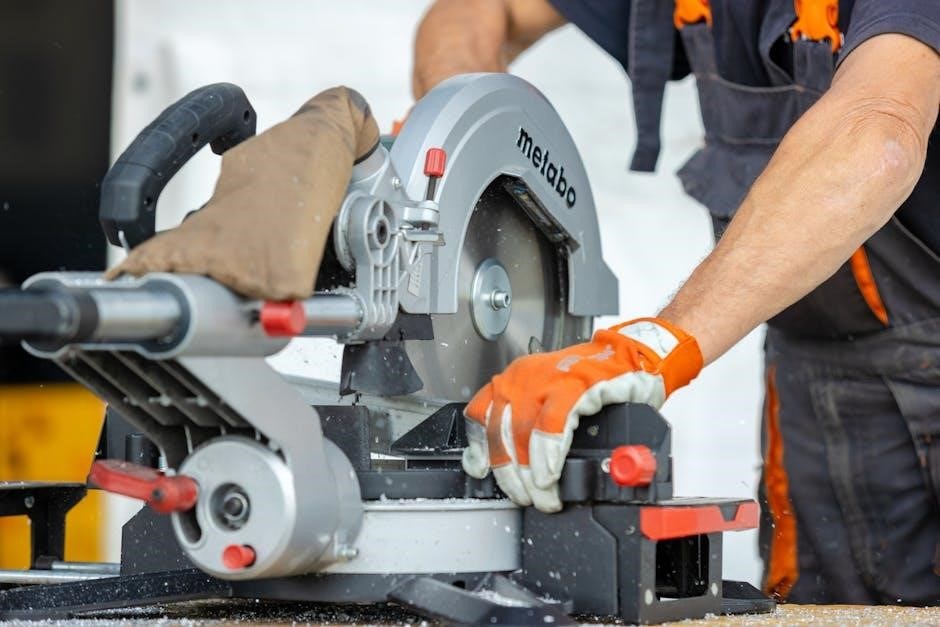
The Importance of Push Stick Safety
Prioritizing safety with a table saw is paramount, and a push stick is a fundamental component of that safety strategy. Kickback, where the wood is thrown back towards the operator, is a significant hazard, and a push stick helps mitigate this risk by maintaining downward pressure.
Even with careful technique, accidents can happen, and a push stick provides a crucial layer of protection. Utilizing a readily available table saw push stick template PDF allows for quick creation of multiple sticks, ensuring one is always within reach. Remember, a momentary lapse in concentration can lead to serious injury; a push stick is a small investment for substantial safety.
Types of Table Saw Push Sticks
Table saw push sticks broadly fall into two categories: simple, single-piece designs and more complex combination styles. Simple sticks, easily created using a table saw push stick template PDF, focus on keeping hands clear of the blade during rip cuts.
Combination sticks often incorporate a hold-down feature, adding extra control and stability. Some designs prioritize a comfortable grip and quick release in emergencies. Many woodworkers prefer creating their own, utilizing readily available templates to customize dimensions and ergonomics. The “best” type depends on individual preference and the specific cutting task, but all aim to enhance safety.
Simple Push Stick Designs
Simple push sticks are often favored for their quick construction, frequently utilizing a table saw push stick template PDF for easy replication. These designs typically consist of a straight piece of wood with a contoured handle for a secure grip.
A common variation features a forked end that slides along the fence, providing controlled forward pressure. These are considered disposable, encouraging frequent replacement when wear occurs. Woodworkers often trace preferred shapes, cut them out, and keep a supply ready. Prioritizing safety, these designs focus on keeping fingers well clear of the blade’s path during operation.
Push Blocks vs. Push Sticks
Push blocks and push sticks both enhance table saw safety, but differ in application. Push sticks, often created using a table saw push stick template PDF, are ideal for rip cuts, guiding wood along the fence.
Push blocks, conversely, apply downward pressure on top of the workpiece, preventing lift and improving control. While a stick is simpler to fabricate quickly, a block offers greater stability for wider stock. Many woodworkers utilize both, adapting their choice to the specific cut and material. Ultimately, the “best” tool is the one consistently used to maintain safe hand positioning.
Combination Push Stick/Hold-Down Designs
Innovative designs merge the functionality of push sticks and hold-downs, maximizing safety and control at the table saw. These hybrid tools, often built from a table saw push stick template PDF, feature a foot or extension that presses down on the workpiece while simultaneously advancing it.
This dual action minimizes lift and kickback risk, particularly beneficial with larger or slightly warped boards. Some designs incorporate adjustable features for varying stock thicknesses. While potentially more complex to construct, the added security and versatility make them a valuable addition to any workshop, streamlining operations and bolstering safety protocols.
Finding Table Saw Push Stick Templates (PDF)
Locating a table saw push stick template PDF is surprisingly easy with a quick online search. Websites dedicated to woodworking plans and DIY projects frequently offer free downloads. Online forums and communities focused on woodworkers are also excellent resources, often sharing user-created designs.
Dedicated woodworking sites, like I Manual, provide templates alongside project instructions. A targeted search using keywords like “free push stick template PDF” will yield numerous results. Remember to preview the template before printing to ensure it suits your needs and skill level, prioritizing safety and ease of construction.
Free Online Push Stick Templates
Numerous websites offer free table saw push stick templates in PDF format. These resources cater to various skill levels, from beginner-friendly designs to more complex options. A simple web search reveals a wealth of downloadable plans, often shared by woodworking enthusiasts and online communities.
Many woodworkers prefer to trace existing shapes they like, creating a personalized and readily available supply. The key is finding a design that feels comfortable and secure in your hand, prioritizing safety above all else. Remember, the “best” template is the one you’ll consistently use to protect your fingers!
Paid Push Stick Template Resources
While many free table saw push stick templates are available, some woodworkers opt for paid resources offering more refined or specialized designs. These often come as detailed PDF downloads, potentially including multiple variations and step-by-step instructions.
Paid templates may feature advanced ergonomics, quick-release mechanisms, or combination designs integrating hold-down functionality. Platforms like Etsy or woodworking-specific marketplaces frequently host these offerings. Investing in a premium template can provide a higher level of precision and potentially save time during construction, though a simple, functional design remains paramount for safety.
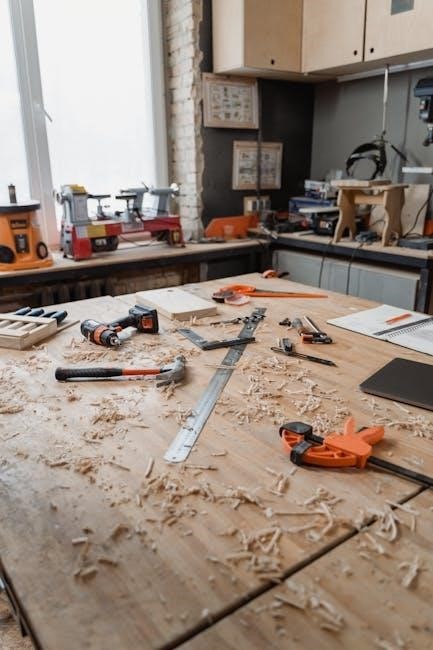
Materials for Making Push Sticks
Constructing a table saw push stick requires selecting appropriate materials for durability and safety. Wood is the most common choice, with templates readily available as PDF downloads to guide cutting. Beyond wood, acrylic and various plastics offer alternatives.
The chosen material should be rigid enough to provide consistent pressure but not brittle enough to shatter upon impact. Utilizing a push stick template ensures accurate dimensions regardless of the material. Consider the grip – adding rubber or cork can enhance control. Ultimately, the material should prioritize keeping your hands safely away from the blade.
Wood Selection for Push Sticks (Hardwood vs. Softwood)
Choosing between hardwood and softwood for a table saw push stick impacts its longevity and performance. Hardwoods like maple, oak, or beech offer superior durability and resistance to wear, ideal for frequent use. Utilizing a push stick template PDF ensures consistent shape regardless of wood type.
Softwoods, such as pine, are easier to work with but are more prone to denting and splitting. While acceptable for quick, disposable push sticks, they lack the robustness of hardwoods. Consider the trade-off between ease of construction and long-term reliability when selecting your material, always prioritizing safety.
Alternative Materials (Acrylic, Plastic)
Beyond wood, materials like acrylic and plastic present viable alternatives for crafting table saw push sticks. Acrylic offers excellent visibility, allowing a clear view of the blade and workpiece, enhancing safety. Plastic, particularly durable polymers, provides a lightweight and cost-effective option.
Using a push stick template PDF simplifies cutting these materials to the desired shape. However, consider that acrylic can be brittle and plastic may offer less grip than wood. Ensure the chosen material doesn’t melt or deform under friction and provides a secure hold for effective, safe operation.
DIY Push Stick Construction
Embarking on DIY push stick construction is straightforward with a table saw push stick template PDF. Begin by printing and adhering the template to your chosen material – hardwood is recommended for durability. Carefully cut along the template lines using a jigsaw or bandsaw, ensuring accuracy for a snug fit and optimal safety.
Sanding the edges smooth is crucial for comfort and preventing splinters. Prioritize ergonomics; a comfortable grip enhances control. Remember, a quickly-made, functional push stick is better than a complex, unused one. Keep several templates handy for rapid replacements as needed!
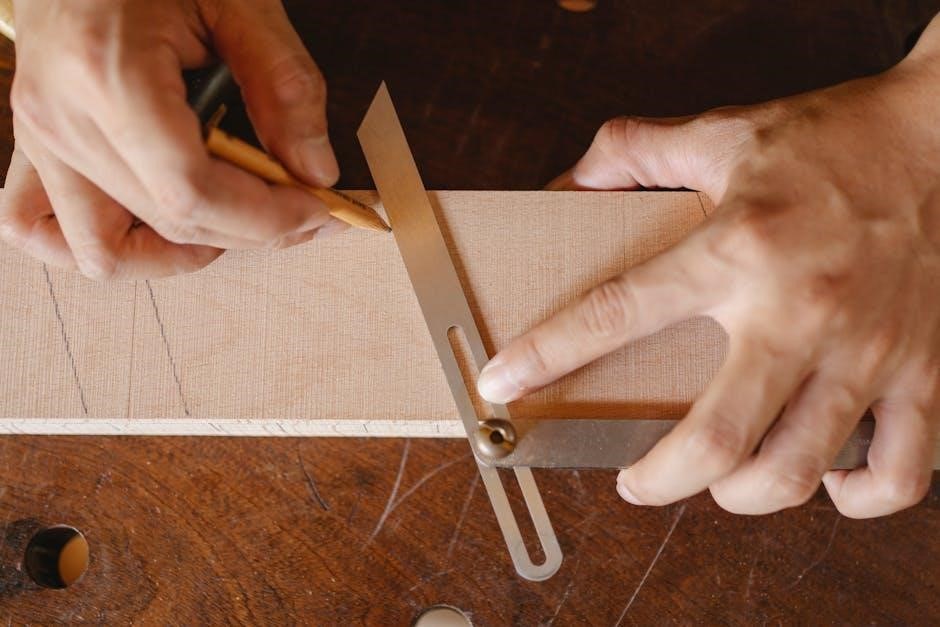
Cutting Out Your Push Stick Template
Once you’ve downloaded and printed your table saw push stick template PDF, carefully cut it out along the designated lines. Precision is key for an accurate pattern. Adhere the paper template firmly to your chosen material – hardwood is ideal – using spray adhesive or tape.
Employ a jigsaw or bandsaw to follow the template’s outline. Take your time, especially on curves. A sharp blade ensures clean cuts and minimizes splintering. After cutting, double-check the shape against the template to confirm accuracy before proceeding to shaping and sanding.
Shaping and Sanding for Comfort
After cutting out your push stick based on the template PDF, shaping and sanding are crucial for a comfortable and secure grip. Use a rasp or file to round off any sharp edges, focusing on areas that will contact your hand. Progress to sandpaper, starting with a coarser grit (80-120) to remove imperfections.

Gradually increase the grit (180-220) for a smooth finish. Pay attention to the handle and any contact points. A comfortable shape reduces hand fatigue and improves control during use. Ensure all surfaces are smooth to prevent splinters and enhance grip, maximizing safety.
Adding Grip Features

Enhancing the grip of your push stick, built from a template PDF, is vital for control and safety. Consider adding textured surfaces using sandpaper or carving shallow grooves. Rubberized coatings, like tool dip, provide excellent friction, even with sweaty hands.
Alternatively, strategically placed cork or rubber pads can significantly improve grip. Ensure these additions don’t interfere with the stick’s functionality or create pinch points. A secure grip minimizes the risk of slippage, keeping your hands safely away from the blade. Prioritize features that offer a firm hold during operation.
Push Stick Design Considerations
When utilizing a table saw push stick template PDF, prioritize designs that maximize safety and usability. Ergonomics are key; the stick should feel comfortable and natural in your hand, promoting a secure grip. Consider the specific cuts you’ll be making – narrow rips benefit from different shapes than wider ones.
Designs should allow for quick release in case of kickback, avoiding finger entrapment. A well-designed push stick facilitates control, ensuring smooth, accurate cuts. Remember, the “best” design is the one you consistently use, so choose a template that suits your needs and preferences.
Ergonomics and Hand Comfort
Selecting a table saw push stick template PDF should heavily consider ergonomics. The design must comfortably fit your hand, preventing fatigue during extended use. A natural grip reduces strain and enhances control, crucial for accurate cuts. Avoid templates with sharp edges or awkward angles that could cause discomfort or blisters.
Prioritize designs that allow a firm, yet relaxed hold. Contoured shapes conforming to the hand’s natural curves are ideal. Remember, a comfortable push stick encourages consistent use, directly improving safety. A poorly designed stick may be discarded, defeating its purpose.
Ease of Use and Control
When choosing a table saw push stick template PDF, prioritize designs that offer intuitive operation and maximum control. The template should facilitate a smooth, consistent feed rate, minimizing the risk of kickback. Look for features that allow easy engagement with the workpiece and secure contact with the fence.
Simplicity is key; avoid overly complex designs that hinder quick adjustments. A well-designed push stick should feel like an extension of your hand, providing precise guidance. Consider templates offering multiple gripping points or angles for versatility. Remember, ease of use directly translates to safer and more accurate cuts.
Quick Release/Escape Features
A crucial aspect when selecting a table saw push stick template PDF is considering quick release features. Designs should allow for immediate disengagement in case of binding or unexpected movement. Avoid templates that create a firm grip, potentially trapping your hand.
Look for templates promoting a “slip” action, enabling swift removal of the push stick. Some designs incorporate features that minimize contact area, reducing the chance of being pulled into the blade. Prioritize templates that allow for a natural, instinctive reaction in emergency situations – a fast escape is paramount for safety.
Using a Push Stick Effectively
Employing a push stick, built from a table saw push stick template PDF, requires consistent technique. Maintain firm, controlled pressure, guiding the workpiece steadily. Never extend hands beyond the push stick’s path.
For rip cuts, position the stick firmly against both the fence and the workpiece, ensuring a secure connection. Avoid angled pressure, which can cause kickback. Remember, the push stick isn’t a replacement for careful attention; it’s a safety aid. Regularly inspect your push stick for damage and replace it when necessary, prioritizing safe operation.
Proper Technique for Rip Cuts
When performing rip cuts utilizing a push stick crafted from a table saw push stick template PDF, maintain a consistent feed rate. Ensure the stick engages both the workpiece and the table saw fence simultaneously.
Avoid forcing the wood; let the blade do the work. Keep your hands positioned safely behind the push stick at all times. If resistance is felt, stop immediately and reassess. A properly designed push stick, based on a reliable template, enhances control and minimizes risk during these crucial operations, promoting safer woodworking.
Using Push Sticks with Featherboards
Combining a push stick, built using a table saw push stick template PDF, with featherboards significantly boosts safety and accuracy during rip cuts. Featherboards maintain consistent pressure against the workpiece, reducing the chance of kickback.
The push stick then guides the wood through the blade, keeping your hands well clear of the cutting path. This synergy is particularly effective for narrower stock. Always ensure the featherboards are properly aligned and secured before operation. Utilizing both tools together maximizes control and minimizes risk, creating a safer and more precise cutting experience.
Maintaining Your Push Sticks
Regular inspection of your push sticks, even those made from a downloaded table saw push stick template PDF, is crucial for continued safety. Check for cracks, splinters, or any signs of wear and tear. A damaged push stick compromises its effectiveness and increases risk.
Since many view them as disposable, having multiple, quickly made from traced templates, is practical. Replace worn or damaged sticks promptly. Sand rough edges to maintain a comfortable grip. Proper maintenance ensures your push stick remains a reliable safety tool, protecting your hands during operation.
Inspecting for Damage

Thoroughly examine your push sticks – whether crafted from a table saw push stick template PDF or purchased – before each use. Look for cracks, especially around areas of stress or where the wood is thinner. Splinters are a significant hazard; sand them down immediately or discard the stick.
Check for warping or deformation, which can affect control. A push stick showing signs of significant wear should be replaced. Remember, these are often considered disposable safety items. Prioritize a functional, undamaged push stick to maintain a safe working environment and prevent accidents.
Replacing Worn Push Sticks
Given that push sticks are considered consumable safety items, proactively replacing worn ones is crucial. If your push stick, built from a table saw push stick template PDF or otherwise, shows significant damage – cracks, splintering, or deformation – it’s time for a replacement.
Many woodworkers maintain a collection, quickly fabricating new sticks from scrap wood using their preferred template. This ensures a readily available, safe option. Don’t delay replacement; a compromised push stick offers diminished protection. Prioritize safety and keep a supply on hand for uninterrupted, secure operation of your table saw.