Flipper Remote Manual: A Comprehensive Guide
This manual details the Flipper Zero’s remote control capabilities, including universal remote functionality, supported devices, and programming instructions. It covers ActiveX control, safety, and updates.
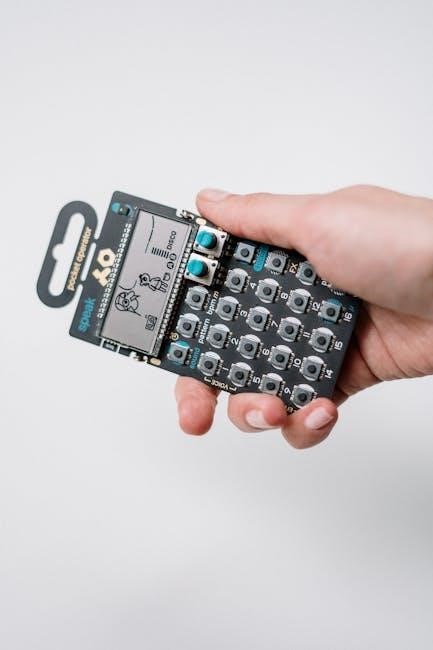
The Flipper Zero is a portable, multi-tool device designed for penetration testing and access control system research. Emerging in 2020, it quickly gained notoriety as a “pocket-sized hacking tool.” Its versatility extends to remote control functionality, allowing users to interact with various devices. This manual focuses on leveraging the Flipper Zero as a universal remote, exploring its compatibility and programming aspects.
Understanding its core capabilities is crucial. The device supports GSM and GPRS networks, and features a microcontroller enabling diverse operations. This guide provides a comprehensive overview, from initial setup to advanced features, ensuring users can effectively utilize the Flipper Zero’s remote control potential. Careful reading of these instructions is essential for safe and optimal operation.
Understanding the Flipper Zero
The Flipper Zero’s hardware comprises a microcontroller and various wireless communication protocols, including GSM and GPRS, operating on 900, 1800, and 1900 bands. Its schematic diagram details the connections between these components. The device’s front-end allows website loading and utilizes modern tools for enhanced functionality.
For remote control, the Flipper Zero emulates signals from existing remotes. It’s crucial to understand that the product pictures in manuals are for reference only; actual product variations may exist. The Flipper ActiveX Control facilitates client applications to control Flipper units. Proper operation requires careful adherence to the safe operation guide, especially regarding prewired remote pump kits and foot-operated pumps.

Key Features and Capabilities
The Flipper Zero boasts universal remote control functionality, supporting numerous devices via programmable code lists for various brands like Hama. It offers encryption for personal notes, enhancing data security. Its capabilities extend to controlling flipper units through the Flipper ActiveX Control.
Furthermore, the device supports video resolutions including 1080i59.94, 1080P29.97, 720P59.94, and 1080P59.94. Regular updates, like the one in April 2023, continually expand its features, solidifying its position as a “tamagotchi for hackers.” The Flipper Big Button Universal Remote (A22.NA.V5) provides simplified control for two devices, emphasizing ease of use and future-proof functionality.

Remote Control Functionality
This section details the Flipper Zero’s ability to function as a universal remote, covering device compatibility, programming, and troubleshooting potential issues.

Universal Remote Control Guide
The Flipper Zero excels as a universal remote, offering control over a wide array of devices. Utilizing code lists for various brands – like Hama – simplifies setup. The device supports numerous protocols, enabling compatibility with TVs, and potentially other electronics. Programming involves selecting the correct code for your specific brand and model, often found in included manuals or online databases.
Successful operation relies on accurate code input and proper device targeting. The Flipper’s interface allows for number and letter input, crucial for navigating extensive code lists. Remember that product pictures in manuals are for reference only; actual product variations may exist. Careful reading of instructions before installation is essential for optimal performance and future reference.
Supported Devices and Compatibility
The Flipper Zero demonstrates broad compatibility, functioning with devices utilizing GSM and GPRS networks on 900, 1800, and 1900 bands. While primarily focused on remote control functionality for TVs and similar electronics – as seen with the Hama 8-in-1 remote – its capabilities extend beyond traditional infrared control.
Compatibility isn’t universally guaranteed; success depends on the device’s remote protocol and the availability of corresponding code lists. The Flipper Big Button Universal Remote (A22.NA.V5) exemplifies expanded device support. Further research may be needed to confirm compatibility with specific models, ensuring seamless integration and control within your existing setup.
Programming the Flipper as a Remote
Programming the Flipper Zero as a remote involves utilizing code lists specific to various brands, enabling control of diverse devices. The Hama Universal 8-in-1 Remote Control User Manual provides examples of these codes. Users select the appropriate code for their device, inputting it via the Flipper interface.
The Flipper ActiveX Control facilitates client applications to manage multiple Flipper units, streamlining the programming process. Careful adherence to installation instructions is crucial for optimal performance. Remember to store these instructions for future reference, ensuring continued functionality and ease of use when configuring the device.
Code Lists for Various Brands
Accessing comprehensive code lists is vital for successful Flipper Zero remote programming. The Hama Universal 8-in-1 Remote Control User Manual serves as a valuable resource, offering codes for numerous television and device manufacturers. These codes allow the Flipper to emulate existing remote controls, granting functionality across a broad spectrum of electronics.
Users should consult brand-specific documentation whenever possible to ensure accurate code selection. While the Flipper’s capabilities are extensive, compatibility varies. Regularly updated code databases enhance the device’s versatility, expanding the range of supported brands and models. Proper code input is essential for reliable operation.
Troubleshooting Remote Control Issues
If the Flipper Zero fails to control a device, verify the correct code has been programmed. Incorrect codes are the most common cause of remote control malfunctions. Double-check the manufacturer’s code list and re-enter the code carefully. Ensure the Flipper is within range of the target device and that there are no obstructions.
Battery levels should also be checked, as low power can diminish signal strength. If problems persist, attempt a factory reset of the Flipper’s remote functionality. Refer to the user manual for detailed instructions. Don’t waste the product; careful troubleshooting often resolves issues.

Technical Specifications
The Flipper Zero utilizes a microcontroller with GSM/GPRS wireless communication. Hardware components are detailed in schematic diagrams, supporting various video resolutions like 1080i and 720P.
Hardware Components and Connections
This section provides a detailed schematic diagram illustrating the internal hardware components and their interconnections within the Flipper Zero device. The diagram meticulously outlines the placement and connections of the microcontroller, which serves as the central processing unit, alongside other essential electronic elements. Understanding these connections is crucial for advanced users and developers seeking to modify or extend the device’s functionality. The documentation clarifies how various modules, including wireless communication interfaces, are integrated and interact with the microcontroller. It also highlights the power distribution network and signal routing pathways, offering a comprehensive overview of the device’s internal architecture. This information is vital for troubleshooting, repair, and custom hardware integration projects.
Microcontroller Details
The Flipper Zero’s core functionality relies on a powerful microcontroller, serving as the brain of the device. This microcontroller manages all operations, from signal processing to wireless communication and data storage. Detailed specifications, including clock speed, memory capacity (RAM and Flash), and peripheral interfaces, are crucial for developers. Understanding its architecture allows for optimized firmware development and custom application creation. The microcontroller’s capabilities enable the Flipper Zero to emulate various devices and protocols. Its low-power consumption contributes to the device’s extended battery life. Further technical documentation outlines the microcontroller’s register map and programming interface, facilitating advanced customization and control.
Wireless Communication Protocols (GSM, GPRS)
The Flipper Zero incorporates wireless communication capabilities, including support for GSM and GPRS networks. This allows for potential applications involving cellular communication, though functionality may be limited by regional regulations and hardware support. The device operates on the 900, 1800 (DCS/PCN), and 1900 (PCS) bands, ensuring compatibility with a wide range of networks. Understanding these protocols is essential for developers seeking to leverage cellular connectivity. However, it’s crucial to note that utilizing these features requires appropriate SIM card integration and adherence to local laws. Further investigation into the specific implementation details is recommended for advanced users.

Operational Safety
Always read instructions carefully before installation. Prioritize safe operation with prewired remote pump kits and foot-operated pumps, ensuring responsible device usage.
Safe Operation Guide
Prioritizing safety is paramount when utilizing the Flipper device. Carefully review all instructions before attempting installation or operation to prevent potential issues; The guide emphasizes responsible use of prewired remote pump kits, ensuring intelligent control and standard range functionality. Be mindful of foot-operated pumps and faucets, adhering to recommended guidelines for optimal performance and longevity.
Always store these instructions for future reference, enabling consistent safe practices. Avoid wasting the product through misuse or neglect. Understand the device’s capabilities and limitations to prevent unintended consequences. Proper handling and adherence to safety protocols will maximize the Flipper’s benefits while minimizing risks. Remember that responsible operation is key to a positive user experience.
Prewired Remote Pump Kit Information
The Flipper device supports prewired remote pump kits, offering intelligent control for various applications. These kits are designed for ease of installation and reliable operation within a standard range. Users benefit from streamlined functionality, allowing remote activation and management of pumping systems. Compatibility extends to diverse setups, enhancing convenience and efficiency.
Ensure proper connection of all components according to the provided diagrams. Regularly inspect wiring and connections for wear or damage. Adhere to recommended voltage and current limits to prevent system overload. Utilize the Flipper’s programming capabilities to customize pump operation based on specific needs. Proper maintenance and adherence to guidelines will ensure optimal performance and longevity of the kit.
Foot Operated Pumps and Faucets
The Flipper Zero’s versatility extends to controlling foot-operated pumps and faucets, offering hands-free operation for enhanced hygiene and convenience. These systems, like Gusher Galley and Babyfoot models, can be integrated with the Flipper for remote activation and customized control sequences. This functionality is particularly useful in environments requiring strict sanitation protocols or accessibility considerations.
Programming the Flipper allows users to define specific pump durations and activation patterns. Ensure compatibility with the pump’s voltage and current requirements before connecting; Regularly check the pump’s mechanical components for wear and tear. Proper integration and configuration will maximize efficiency and reliability, providing a seamless user experience.

Advanced Features
Explore encryption for notes, the Flipper’s front-end functionality—from website loading to modern tools—and stay updated with the latest Flipper Zero developments and enhancements.
Encryption of Personal Notes
The Flipper Zero offers a robust feature for securing sensitive information: encryption of personal notes. This functionality allows users to store private data directly on the device, protected by a password or key. This is particularly useful for storing credentials, codes, or any information you wish to keep confidential.
The encryption process utilizes advanced algorithms to render the notes unreadable without the correct decryption key. Users have full control over the encryption settings, ensuring a high level of security. This feature enhances the Flipper Zero’s utility as a secure and versatile tool for everyday tasks and specialized applications, safeguarding your valuable data from unauthorized access.
Flipper Front-End Functionality
The Flipper Zero’s front-end has evolved significantly, transitioning from basic website loading to sophisticated tools. Initially, it focused on simple web browsing, but now boasts a powerful interface for interacting with various applications and services. This includes custom-built front-ends designed to leverage the device’s unique hardware capabilities.
Modern tools allow users to create and deploy custom applications directly onto the Flipper Zero, expanding its functionality beyond pre-defined features. This open-source nature fosters a vibrant community of developers constantly pushing the boundaries of what’s possible, making the Flipper Zero a truly adaptable and versatile device.
Flipper Zero Updates and Developments
Since its 2020 debut, the Flipper Zero has undergone continuous development, fueled by a dedicated community and the core team. Updates regularly introduce new features, improve existing functionality, and address security concerns. These enhancements range from expanded protocol support to refined user interface elements, ensuring a consistently improving user experience.
Recent updates have focused on expanding the device’s capabilities as a versatile tool, particularly within the realm of hardware interaction and security research. The ongoing commitment to open-source development allows for community contributions, accelerating innovation and solidifying the Flipper Zero’s position as a leading platform for ethical hacking and exploration.

Product Information
Model 5753035, released August 21, 2025, lists for $6.64. Variations exist; actual products may differ from manual pictures. HD LCD flipper is ultra-thin.
Model Numbers and Release Dates
Understanding the Flipper Zero’s various models and their corresponding release dates is crucial for identifying specific features and compatibility. As of January 19, 2026, management number 5753035 corresponds to a model released on August 21, 2025, with a list price of $6.64.
This particular model falls under the Electronics, TV & Video, and Gadgets category. It’s important to note that Flipper Zero has undergone several developments since its initial launch in 2020, with ongoing updates and new iterations continually emerging. The Flipper Big Button Universal Remote, model A22.NA.V5, is another available option. Always refer to the product packaging and documentation for the most accurate and up-to-date information regarding model numbers and release dates.
Video Resolution Settings
The Flipper device offers a range of video resolution settings to optimize viewing experience based on display capabilities and preferences. Available options include 1080i59.94 (setting 0), 1080P29.97 (setting 1), 720P59.94 (setting 2), and 1080P59.94 (setting 3).
These settings allow users to tailor the output to match their television or monitor’s native resolution, ensuring the clearest and most visually appealing picture quality. It’s important to consult your display’s manual to determine its supported resolutions. The machine utilizes an ultra-thin HD LCD flipper, and these settings are accessible through the device’s interface for easy adjustment. Proper resolution selection enhances overall usability.
Product Pictures and Actual Product Variations
Please note that the product pictures featured within this manual are provided solely for illustrative reference purposes. Actual product appearance may differ slightly due to manufacturing variations, ongoing design refinements, and display discrepancies. Variations can include minor cosmetic differences, such as color shades or texture nuances.
The Flipper Zero, for example, exists in several iterations, and the images aim to represent the general form factor. It’s crucial to refer to the physical product received for accurate details. The machine is an ultra-thin HD LCD flipper, but slight differences are possible. Always prioritize the actual product over the images shown.

Additional Resources
Explore Flipper ActiveX control functionality for client applications, user manual storage for future reference, and bestseller ranking information for availability details.
Flipper ActiveX Control Functionality
The Flipper ActiveX Control delivers essential functionality, enabling client applications to seamlessly manage and operate one or more Flipper units. This control facilitates direct interaction with the device, allowing developers to integrate Flipper capabilities into custom software solutions. To effectively utilize this control, applications must specify the precise unit number intended for operation via the Remote Controller.
This targeted approach ensures accurate command execution and prevents unintended actions on other connected Flipper devices. The system supports both numerical and alphabetical designations for unit identification, providing flexibility in device naming and organization. Developers can leverage this control to build sophisticated applications tailored to specific Flipper use cases, enhancing the device’s versatility and expanding its potential applications.
User Manual Storage and Future Reference
Preserving this Flipper Remote Manual is crucial for optimal device operation and long-term usability. Carefully read all instructions before installation to ensure a smooth setup process and prevent potential issues. Retain this manual in a safe, accessible location for future consultations, troubleshooting, or when revisiting specific functionalities.
Proper storage safeguards against loss or damage, allowing quick access to vital information whenever needed. Do not discard the manual, as it contains essential details regarding safety precautions, operational guidelines, and technical specifications. Referencing this guide will maximize your Flipper experience and ensure continued enjoyment of its diverse features.

Bestseller Ranking and Availability
As of January 19, 2026, specific Flipper models, like the Flipper Big Button Universal Remote (A22.NA.V5), demonstrate strong market performance. The management number 5753035, released on August 21, 2025, is currently listed at $6.64. Availability varies depending on the retailer and region, but generally, the Flipper Zero and related accessories are widely accessible through electronics stores and online marketplaces.
Its bestseller ranking reflects the growing demand for versatile, multi-functional devices. Regularly check online platforms for updated stock information and potential promotions. The Flipper’s popularity stems from its unique capabilities and appeal to a broad audience, solidifying its position as a leading gadget.